
DIY Tie-Dye with Wine
How to Tie-Dye a Shirt with Wine
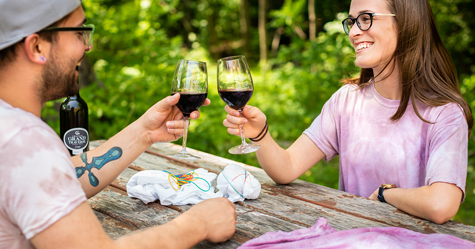
Get groovy with grapes!
If you threw a party and have half-empty bottles of red wine lying around, Chateau Grand Traverse has the perfect activity for you, your friends and your kids. Tie-dying with wine is a fun way to re-purpose half-finished bottles of spoiled wine that would otherwise go to waste. Two bottles of wine, or several partial bottles, are typically enough to dye a few shirts.
DIY Tie-Dye with Wine: Easy Instructions
To begin, grab a few white T-shirts and two dozen rubber bands. No T-shirts? You can dye just about any natural fabric, as long as it’s a light color; 100 percent white cotton is a perfect choice, but you can play with your options.
Make Your Design
Gather up and twist areas of the fabric into a shape that will influence the final dye design (see ideas below!). Use rubber bands to secure the twisted bunches. The tighter you bundle the fabric, the more white areas there will be. Depending on what pattern you want, there are a few methods for twisting the fabric:
- Big swirl – Lay the fabric flat on a table, and pinch it in the middle. Slowly twirl the fabric around the pinch point until it forms a small ball. Secure the ball with rubber bands.
- Little swirls – Pinch small areas of the fabric and twist them into “horns” a few inches tall. Secure each bundle with rubber bands at the bottom, middle and top.
- Bull’s-eye – Grab the fabric in the middle, and hold it up so it hangs down. Use rubber bands every two inches to bundle up the fabric as you would a pony tail.
- Diagonal stripes – Lay the fabric flat, and fold it accordion-style (back and forth in small sections) diagonally. Secure the fabric every two inches with rubber bands.
- Psychedelic– Crinkle up the fabric randomly into a ball, and secure it with rubber bands.
Dye the Fabric
Pour all the wine into a pot, and bring it to a boil. Remove the pot from the heat once it’s boiling, and slowly lower the fabric into the wine with metal or silicone tongs. You may not have enough wine to submerge the fabric; if this is the case, pour the hot wine over the fabric in a stainless steel or glass bowl.
For the deepest color, allow the fabric to sit in the wine (not on the stove) for up to 24 hours. Reposition the bundles of fabric and stir the wine every 5 hours. Otherwise, soak the fabric for at least four hours.
Dry and Iron the Fabric
After you remove your shirts from the wine, allow the fabric in the bundles to dry before you remove the rubber bands. You may place the fabric bundles outside in the sun for a day or two, or you can put them in a warm oven (150 degrees) and periodically supervise them until they are dry. (Don’t ruin craft time with a fire!)
Once the fabric is dry, remove the rubber bands and admire your design. We’re guessing it looks awesome! To ensure the color is set, iron the fabric carefully. Place cardboard or an old towel between the dyed fabric and the ironing board to prevent the wine from bleeding into the ironing board.
Rinse and Wash the Fabric
Rinse the fabric in the sink under running water to remove any wine that did not set. Begin with hot water, and gradually turn the water to cold while you rinse and wring out the fabric. Keep rinsing the fabric until the water runs clear. Next, use a small amount of detergent to hand-wash the fabric in the sink with cold water.
When it’s time for your fabric’s first trip to the washing machine, wash it by itself or with other wine-dyed clothing to prevent the wine from staining other items.
Taste What You Wear
Come visit us at our tasting room, and taste the wine that gave your shirt that vibrant color. We offer a variety of local wines made from grapes grown right here on the scenic Old Mission Peninsula. Sorry, there won’t be any leftovers for tie-dying projects – you’ll want to finish every glass!